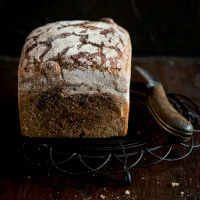
How to Send Bread in the Mail
 Homemade bread can make a great gift for people you love because it is a thoughtful present made with love and effort. But what if your loved ones live far away? Will a loaf of homemade bread survive being shipped in the mail a few states over or even across the country? Let’s figure out how to send bread in the mail and ensure it reaches its intended recipient without any trouble.
Bake the Right Kind of Bread
There are many types of bread; some of them have a longer shelf life and survive transportation better then others. Dense quick bread (such as pumpkin bread, banana bread, zucchini bread, etc.) is the best to ship because it can stay fresh for up to a week and holds up well in transit. Crusty bread, like baguette or ciabatta, and sourdough bread are also suitable for shipping, as long as you pack them properly.
However, very soft, moist, sweet, and high yeast breads are better left unshipped. Yeast breads can be frozen before shipping, which might make them hold up better, but in this case you will need to use cold packs to maintain the right ambient temperature while in transit.
Choose the Best Shipping Service
The less time your bread spends in transit, the better. If you can afford to pay a little extra for shipping, we suggest that you splurge on next-day or two-day delivery such as UPS Next Day Air or UPS 2nd Day Air. USPS Priority Mail is a more cost-effective option that delivers within a 1–3 day window; it is a great balance of shipping speed and cost. To make sure your bread is delivered as promptly as possible, we recommend that you send it early in the week (Monday to Wednesday) to avoid weekend delays.
Pack Your Bread Properly
When it comes to shipping baked goods, including bread, proper packaging is essential to ensure they arrive still fresh and intact. This includes choosing the right packaging materials and using the right packaging techniques.
To send bread in the mail, you will need the following packaging materials:
- Food-grade paper or cloth to wrap the loaf.
- A plastic bag or plastic wrap.
- A sturdy corrugated cardboard box (no padded envelopes!) that is slightly larger than the loaf.
- Gel packs (for shipping frozen bread).
- Padding material (bubble wrap, packing peanuts, crumpled or shredded paper).
- Strong packing tape.
All packaging materials must be clean and odorless because bread, especially freshly baked homemade bread, easily absorbs odors and flavors.
It’s best if you pack and mail your bread as soon as it cools completely. Start with wrapping the loaf in a cloth bag or paper; the first layer of wrapping will absorb any condensation and help to keep the loaf intact. Then wrap the bread in a plastic bag or plastic wrap; it will protect the loaf from exposure to moisture while in transit. If you ship frozen bread, double wrapping with plastic won’t hurt. Instead of a plastic bag, you can wrap the loaf in foil.
Line the bottom of the shipping box with padding material and carefully place the loaf inside. If the bread is frozen, freeze some gel packs beforehand, double wrap each in a plastic bag, and place the gel packs around the loaf in the shipping box. Use padding material to fill the remaining space in the box; it will protect the loaf from external impacts and keep it from jostling.
Finally, close the shipping box and seal it with packing tape, making sure to cover all seams, edges, and corners in order to reinforce the box and protect its contents from water.
Make Sure to Label the Package Correctly
For most packages, it is enough to attach a shipping label with the recipient’s information, return address, and shipping barcode (you can purchase discounted shipping labels online and print them yourself, by the way). However, bread and other food items should be additionally labeled as “perishable” to ensure they are handled with extra care and delivered as quickly as possible.